Hello fellow yarn enthusiasts and crafty creators! Get ready to bring a burst of sunshine and tropical charm into your home with our brand new free crochet pattern: the Pineapple Planter!
Imagine a delightfully textured, adorable pineapple, complete with a leafy green crown, ready to hold your favorite small plant or act as a charming decorative accent. This pattern is an absolute dream for crocheters of all skill levels – especially beginners looking for a fun, rewarding project. It also makes for an incredibly unique and thoughtful handmade gift, or a pop of cheerful home decor for any room.
In this tutorial, we’ll guide you step-by-step, from mastering basic stitches to assembling your cheerful pineapple. You’ll learn how to create the iconic pineapple shape, craft the signature leafy top, and even get tips on how to make it functional as a planter. So, grab your hook and some yarn, and let’s get crafting!
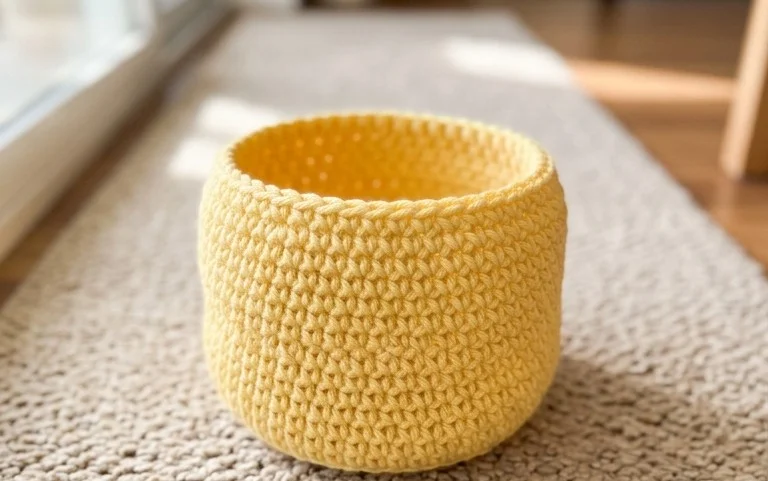
## Bring a Little Tropical Flair to Your Greenery: Crocheting Your Own Pineapple Planter!
Are you looking to add a splash of cheerful color and a touch of whimsical charm to your plant collection? Perhaps you’re searching for a unique handmade gift for the plant lover in your life? Then get ready to be delighted, because today we’re diving into the wonderful world of crocheting your very own Pineapple Planter! This free crochet pattern from A Crafty Concept is a delightful project that’s surprisingly accessible, even for those who are relatively new to the hook-and-yarn adventure. Imagine a vibrant, textured pineapple basking in the sun, cradling your favorite succulent or trailing vine. It’s a project that’s as fun to make as it is to behold!
### Gathering Your Tropical Supplies: Yarn and Hook Recommendations
The beauty of crochet lies in its versatility, and the Pineapple Planter pattern is no exception. To achieve that classic pineapple look, you’ll want to choose yarns that offer good stitch definition and a pleasing texture.
* **Yarn Choice:** For the main body of the pineapple, a worsted-weight cotton or cotton blend yarn is highly recommended. Cotton is excellent for planters because it’s breathable, durable, and holds its shape well. Look for yarns in vibrant yellow or golden hues to capture that quintessential pineapple color. For the leafy crown, a green yarn in a similar weight will be perfect. Consider brands known for their quality and color selection – they’ll make your crafting experience even more enjoyable! Don’t be afraid to explore different shades of yellow and green to find your perfect pineapple palette.
* **Hook Size:** The pattern will typically recommend a crochet hook size that complements the chosen yarn weight. For worsted-weight yarn, a hook in the range of **4.5mm to 5.5mm (US G/6 to I/9)** is usually a good starting point. Using the recommended hook size will help you achieve the correct gauge, which is crucial for your planter to have the right dimensions and structure. Remember, it’s always a good idea to crochet a small swatch before you begin the main project to ensure your gauge matches the pattern’s specifications.
### Mastering the Pineapple’s Texture: Stitch Techniques Explained
This pattern employs a delightful combination of basic crochet stitches, making it an excellent opportunity to practice and refine your skills.
* **Single Crochet (sc):** The backbone of many crochet projects, single crochet creates a dense and sturdy fabric, perfect for the solid body of your planter.
* **Half Double Crochet (hdc):** This stitch adds a bit more height and a slightly looser texture than single crochet, contributing to the pineapple’s overall shape and visual interest.
* **Double Crochet (dc):** The taller double crochet stitch is often used for creating clusters or decorative elements, and in this pattern, it plays a key role in forming the characteristic pineapple texture.
* **Magic Ring/Magic Circle:** This technique creates a tight, seamless starting circle, which is ideal for the bottom of your planter. If you’re new to this, don’t fret! Many tutorials are available online that can guide you through this simple yet effective method.
* **Increasing (inc):** To shape the planter from a flat base into its iconic rounded form, you’ll be using increase stitches. This involves working two stitches into the same stitch from the previous round. The pattern will clearly indicate where and how many increases are needed.
* **Decreasing (dec):** As you work towards closing the top of the planter, you’ll employ decrease stitches to gradually reduce the number of stitches, creating that lovely tapering effect.
* **Slip Stitch (sl st):** This stitch is primarily used for joining rounds and creating smooth transitions.
### A Helping Hook for Beginners: Tips to Get You Started
If you’re relatively new to crochet, don’t let the idea of a “pattern” intimidate you! This Pineapple Planter is a fantastic project to build your confidence.
* **Read Through the Pattern First:** Before you even pick up your yarn, take a few minutes to read through the entire pattern from start to finish. This will give you an overview of the steps involved and help you identify any stitches or techniques you might need to look up.
* **Practice the Stitches:** If any of the stitches mentioned are unfamiliar, take some time to practice them on a scrap piece of yarn. Mastering single crochet, half double crochet, and double crochet will make following the pattern much smoother.
* **Use a Stitch Marker:** Stitch markers are your best friend! They are invaluable for marking the beginning of a round, especially in projects worked in the round. This will prevent you from losing your place and ensure your rounds are joined correctly.
* **Don’t Be Afraid to Undo:** Crochet is a forgiving craft. If you make a mistake, it’s perfectly okay to pull out your stitches (this is called “frogging,” as you “rip-it, rip-it!”) and try again. Everyone makes mistakes, and it’s all part of the learning process!
* **Watch Video Tutorials:** Visual learners rejoice! There are countless excellent crochet tutorials on YouTube for specific stitches, techniques, or even entire pattern sections. If you’re struggling with a particular step, a quick video search can be incredibly helpful.
* **Start with a Lighter Color:** For your first Pineapple Planter, consider using a lighter colored yarn. This will make it easier to see your stitches and identify any mistakes you might be making.
### Infusing Your Personality: Customizing Your Pineapple Planter
One of the greatest joys of handmade items is the ability to infuse them with your personal style. The Pineapple Planter pattern offers plenty of opportunities for customization!
* **Color Play:** While classic yellow and green are iconic, let your creativity run wild!
* **Ombre Effect:** Use a gradient yarn that transitions from a deep yellow at the bottom to a lighter shade at the top.
* **Bold Contrasts:** Experiment with bright pink or turquoise for the leaves, or even a black for a more dramatic, modern pineapple.
* **Seasonal Themes:** Think orange and black for a spooky Halloween planter, or red and green for a festive Christmas decoration.
* **Size Matters:** The pattern is usually designed with a specific size in mind, but you can easily adjust it to fit different pots.
* **Larger Planters:** To make a bigger pineapple, simply continue working additional increase rounds at the bottom until you reach a circumference that fits your desired pot. Then, continue with the body and crown instructions.
* **Smaller Planters:** To make a smaller pineapple, you might need to adjust the number of increase rounds or work fewer rounds in the body. It’s a good idea to measure your pot as you go and adjust accordingly.
* **Adding Embellishments:**
* **Buttons:** Sew on a cute button as a little decorative accent on the side.
* **Embroidery:** Add simple embroidered details like small dots or lines to further mimic the pineapple’s texture.
* **Fringe:** Consider adding a playful fringe of yarn around the top edge for a bohemian touch.
### Keeping Your Pineapple Pristine: Care Instructions
Your crocheted Pineapple Planter is a durable piece, but like any handmade item, it benefits from a little tender loving care to keep it looking its best.
* **Washing:** For general cleaning, spot clean any stains with a damp cloth and mild soap. If a more thorough wash is needed, gently hand wash the planter in cool water with a small amount of mild detergent. Avoid harsh chemicals or bleach.
* **Drying:** Gently squeeze out excess water without wringing. Reshape the planter while it’s still damp and lay it flat on a towel to air dry. Avoid direct sunlight for prolonged periods, which can cause colors to fade.
* **Water Resistance:** While cotton is somewhat water-resistant, it’s not fully waterproof. For plants that require frequent watering, it’s a good idea to place a small plastic pot or liner inside your crocheted planter to protect it from excessive moisture. This will prevent the yarn from becoming overly saturated and potentially developing mildew.
### Beyond the Plant: Endless Project Ideas
The beauty of this Pineapple Planter pattern is its adaptability. While it’s perfect for housing your beloved plants, its potential extends far beyond!
* **Storage Basket:** Use it to store small items like pens, craft supplies, jewelry, or even candy. The pineapple shape adds a delightful touch to any desk or vanity.
* **Gift Packaging:** Instead of traditional gift wrap, present a small gift inside your crocheted pineapple. It’s a unique and memorable way to package presents for birthdays, holidays, or just because.
* **Home Decor Accent:** Even without a plant, this charming pineapple makes a cheerful decorative piece for shelves, mantels, or side tables.
* **Desk Organizer:** Keep your workspace tidy and stylish by using it to hold your crochet hooks, scissors, or other crafting tools.
* **Yarn Holder:** Perfect for holding a ball of yarn while you crochet, preventing it from rolling away.
So, grab your hook, choose your favorite cheerful colors, and get ready to crochet your way to a little piece of tropical paradise. This Pineapple Planter pattern from A Crafty Concept is more than just a crochet project; it’s an invitation to add a touch of handmade happiness to your home and your life! Happy crocheting!
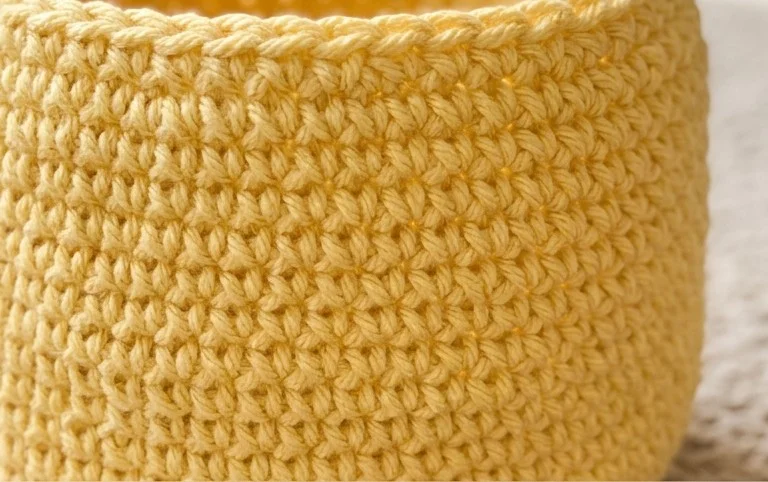
There you have it – a delightful pineapple planter ready to bring a burst of sunshine and handmade charm to your space! We hope you enjoyed this free crochet pattern and are excited to bring your own unique creation to life. Don’t forget to share your finished pineapple planters with us on social media using #ACraftyConcept – we absolutely love seeing your beautiful work!
Feel free to experiment with different yarn colors and textures to make your pineapple truly your own. Perhaps a variegated yarn for a tropical twist, or a metallic thread for a touch of glamour? The possibilities are endless! And if you’re already dreaming of your next crochet adventure, be sure to explore more free patterns right here at A Crafty Concept. Happy crocheting!