Hey there, fellow yarn lovers! Are you ready to add a touch of cozy autumn charm to your home or create the most adorable handmade gifts? Then you’re in the right place! We’re so excited to share our brand new free crochet pumpkin pattern with you. Imagine a plump, perfectly stitched pumpkin, its little stem peeking out, just begging to be displayed on your mantelpiece or gifted to a special someone.
This pattern is an absolute dream for beginners – seriously, if you can chain and single crochet, you’re already halfway there! It’s also perfect for crafting up a whole patch of pumpkins for festive home decor or for whipping up quick and heartfelt presents. Get ready to learn some simple shaping techniques and discover how easy it is to bring these sweet little gourds to life. Grab your hook and your favorite orange yarn, because this tutorial, complete with a step-by-step video, is about to become your new fall obsession!
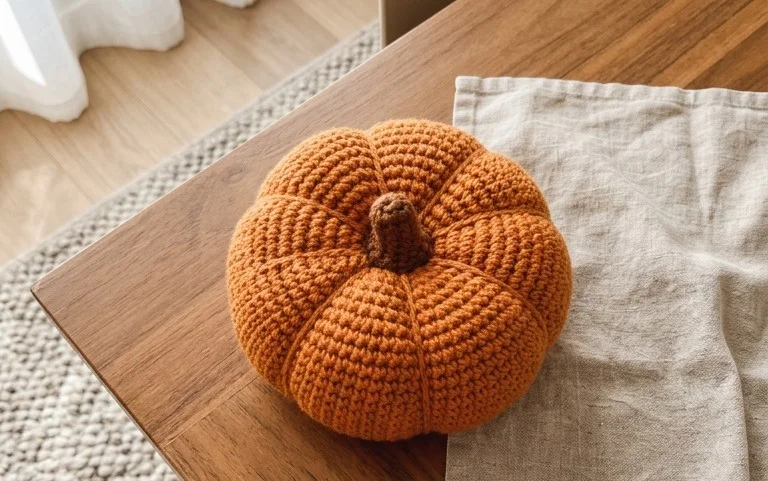
## Harvest a Huggable Friend: Your Guide to the Cutest Crochet Pumpkin Free Pattern
Autumn is in the air, and with it comes a delightful urge to create! Nothing says cozy season quite like a handmade pumpkin, and this “Cutest Crochet Pumpkin Free Pattern” is your ticket to crafting a charming and incredibly huggable addition to your fall decor. Whether you’re a seasoned crocheter or just dipping your toes into the wonderful world of yarn, this pattern is designed to be accessible and rewarding. We’ll walk you through every step, from choosing your perfect yarn to offering tips for making your pumpkin truly unique. Get ready to create a little bundle of autumnal joy!
### Yarn & Hook Recommendations: The Foundation of Your Pumpkin
The yarn and hook you choose will significantly impact the look and feel of your finished pumpkin. For this pattern, we’re aiming for a plump, soft texture that holds its shape well.
* **Yarn Type:** Worsted weight yarn is your best friend for this project. It’s widely available, comes in a fantastic range of colors, and provides a great balance between sturdiness and a pleasing squishiness. Cotton or a cotton blend is an excellent choice as it has a lovely drape and isn’t too slippery to work with, making it ideal for beginners. Acrylic yarn is also a fantastic and budget-friendly option, offering durability and a vast color palette.
* **Color Choices:** Obviously, orange is the classic! Look for shades ranging from soft peach to deep rust for a realistic look. But don’t stop there! Imagine a creamy white pumpkin for a more sophisticated display, a variegated yarn that blends earthy tones, or even a bright, playful color for a whimsical touch. The possibilities are endless! You’ll likely need around 50-100 yards of your main pumpkin color, depending on your tension and desired size. Don’t forget a small amount of brown or green for the stem!
* **Hook Size:** The pattern typically calls for a crochet hook that complements your chosen yarn weight. For worsted weight yarn, a US size H/8 (5.0 mm) hook is a common and excellent starting point. However, if you tend to crochet loosely, consider going down a size (e.g., US G/6 or 4.5 mm) to create a tighter fabric that prevents stuffing from showing through. Conversely, if you crochet tightly, you might need to go up a size. Always check your yarn label for recommended hook sizes as a general guideline.
### Stitch Techniques: Building Your Pumpkin’s Form
This pattern primarily uses a few fundamental crochet stitches that are perfect for building a solid, seamless shape.
* **Magic Ring (or Magic Circle):** This technique creates a tight, adjustable starting loop that is perfect for beginning amigurumi projects like our pumpkin. It ensures there are no gaps at the center.
* **Single Crochet (sc):** This is the workhorse stitch of amigurumi. It creates a dense, fabric that is perfect for stuffed items.
* **Increase (inc):** This involves working two single crochet stitches into the same stitch of the previous round. This stitch is crucial for shaping your pumpkin, gradually widening its circumference.
* **Decrease (dec):** This is the opposite of an increase, where you work two stitches together to reduce the number of stitches. This is used to close off the top of the pumpkin.
* **Slip Stitch (sl st):** Used to join rounds and finish off your work, creating a neat edge.
### Tips for Beginners: Making Your Pumpkin Perfectly Plump
Even if you’re new to crochet, this pattern is designed to be achievable. Here are some tips to help you along the way:
* **Practice the Stitches:** Before you dive into the pumpkin, take a few minutes to practice your magic ring, single crochet, increases, and decreases. Online video tutorials are fantastic resources for visualizing these techniques.
* **Use a Stitch Marker:** This is your new best friend! Place a stitch marker in the first stitch of each round. Since we’ll be working in continuous rounds (no joining with a slip stitch and turning), it’s easy to lose track of where a round begins and ends. A stitch marker will save you so much frustration.
* **Maintain Consistent Tension:** Try to crochet with even tension throughout your project. This will ensure your stitches look uniform and your pumpkin has a smooth, pleasing shape. Don’t pull your stitches too tightly, as this can make it difficult to insert your hook.
* **Stuffing is Key:** Don’t be afraid to stuff your pumpkin generously! This is what gives it its lovely, plump, spherical shape. Stuff firmly but not so tightly that you stretch your stitches and create holes. Work the stuffing in sections as you crochet.
* **Read Ahead:** Before starting each round, quickly read through the instructions for that round to understand what’s coming. This helps prevent mistakes.
* **Don’t Fear Mistakes:** Everyone makes mistakes when crocheting. If you realize you’ve made an error, gently unravel (frogging) the stitches until you reach the mistake and try again. It’s part of the learning process!
### How to Customize: Making Your Pumpkin Uniquely Yours
The beauty of crochet is the endless potential for customization. Here’s how you can personalize your cutest crochet pumpkin:
* **Color Play:** As mentioned earlier, explore beyond traditional orange. Consider ombre yarns, speckled yarns, or even juxtaposing colors for a modern twist. You could also crochet multiple pumpkins in different colors to create a charming set.
* **Size Variations:** This pattern provides a foundation. To create larger pumpkins, simply repeat the increase rounds for more rows before starting the decrease rounds. For smaller pumpkins, you might omit a few increase rounds or use a smaller hook and lighter weight yarn.
* **Stem Styles:** The pattern typically includes a simple crochet stem. Get creative with this! You could make a longer, curvier stem, add a little leaf detail in green yarn, or even use a piece of brown chenille stem for a more textured look.
* **Adding Embellishments:** Once your pumpkin is complete, consider adding embellishments. You could embroider a little face for a friendly character, sew on small beads for a touch of sparkle, or even add a tiny crochet bow.
* **Patchwork Pumpkins:** Experiment with joining different colored yarn for stripes or sections of your pumpkin for a unique patchwork effect.
### Caring for Your Crochet Pumpkin: Keeping It Cozy for Seasons to Come
Handmade items deserve a little extra care to ensure they last.
* **Washing:** For most acrylic or cotton yarns, you can gently hand wash your pumpkin in cool water with a mild detergent. Avoid harsh chemicals or bleach.
* **Drying:** Gently squeeze out excess water (do not wring!). Reshape your pumpkin and lay it flat on a towel to air dry. Avoid putting it in a dryer, as this can cause it to lose its shape or damage the fibers.
* **Spot Cleaning:** For minor spills or dirt, spot cleaning with a damp cloth and a tiny bit of mild soap can often do the trick.
### Project Ideas: More Than Just Decor!
While these pumpkins are undeniably adorable as standalone decor, their versatility extends far beyond!
* **Cozy Fall Garland:** String several pumpkins together with a sturdy yarn to create a festive and inviting garland for your mantelpiece or windows.
* **Charming Table Centerpiece:** Arrange a collection of pumpkins in varying sizes and colors on a tray or directly on your dining table for a warm and welcoming centerpiece.
* **Little Friend for Kids:** Make a smaller, securely stitched pumpkin without any embellishments that could be a choking hazard, and it becomes a soft, huggable toy for little ones to enjoy during the fall season.
* **Gift Giving:** A handmade pumpkin is a thoughtful and unique gift for friends and family who appreciate handmade treasures. Tuck it into a care package or give it as a housewarming gift for a cozy touch.
* **Themed Party Favors:** Small, individually crocheted pumpkins can make delightful and memorable favors for autumn-themed parties.
This “Cutest Crochet Pumpkin Free Pattern” is more than just a craft project; it’s an invitation to embrace the season, create something beautiful with your own two hands, and fill your home with warmth and handmade charm. So grab your yarn, your hook, and let’s get stitching! Happy crocheting!
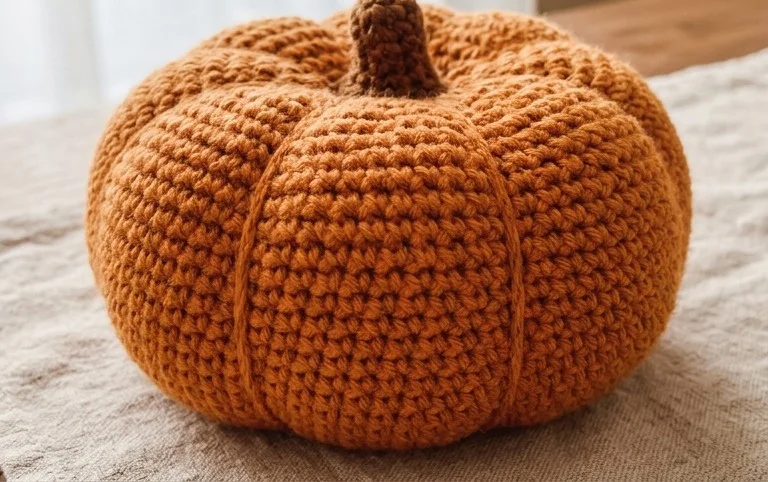
There you have it – your very own adorable crochet pumpkin, ready to bring a touch of handmade autumn charm to your home! I hope you had as much fun creating this quick and easy project as I did sharing it with you. Don’t hesitate to grab your hook and yarn and give this free pattern a try; it’s truly a delight to stitch up!
Once your pumpkin is complete, I’d absolutely love to see your wonderful creations! Tag me on social media using #CrochetPumpkinLove so I can admire your handiwork. Feel free to experiment with different yarn colors, sizes, or even add a little cinnamon stick for a stem – the possibilities are endless! And if you’re looking for more delightful crochet adventures, be sure to explore the rest of my pattern library!