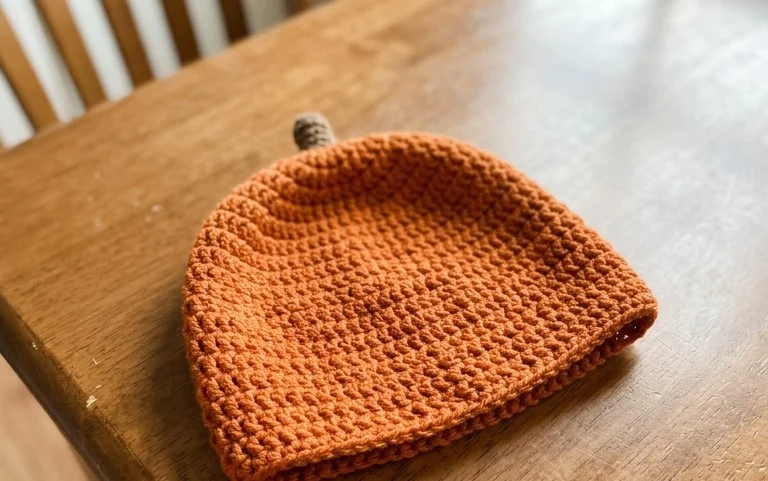
Hello fellow yarn enthusiasts! Get ready to cozy up your little ones (or yourself!) with the most adorable crochet pumpkin hat you’ve ever seen! Imagine a perfectly plump, vibrant pumpkin with a sweet little stem, just waiting to add a touch of autumnal magic to any outfit.
This pattern is an absolute dream for crocheters of all levels. Whether you’re just starting your yarn journey and looking for a fun, rewarding project, or you’re a seasoned pro seeking the perfect handmade gift, this hat is for you! It’s also fantastic for adding a festive touch to your home decor this fall. We’ll walk you through every step, ensuring you learn how to create this charming hat in a range of sizes, from tiny newborn beanies to adult-sized caps. Get your hooks ready – it’s time to make some pumpkin perfection!
## Oh, My Gourd! Crochet the Perfect Pumpkin Hat for Everyone!
The crisp air, the rustling leaves, the irresistible scent of cinnamon – it can only mean one thing: autumn is officially here! And what better way to embrace the cozy vibes and spooky spirit than with a handmade crochet pumpkin hat? Whether you’re crafting a tiny masterpiece for a newborn’s first photoshoot, a whimsical accessory for your little trick-or-treater, or even a fun, oversized topper for yourself, this versatile pattern is designed to bring smiles and warmth to all ages. We’ll dive deep into creating this adorable hat, from choosing the perfect yarn to adding your own unique flair. So grab your hook and let’s get our crochet on!
### Yarn & Hook Recommendations: The Foundation of Your Pumpkin
The right yarn and hook can make all the difference in the look and feel of your finished pumpkin hat. For that classic, slightly textured pumpkin look, we’re going to lean towards worsted weight yarn.
- Yarn Weight: Worsted weight (category 4) yarn is your best friend for this project. It’s readily available, works up at a good pace, and provides just enough structure to hold the pumpkin shape beautifully.
- Fiber Choice: Acrylic yarn is a fantastic choice for pumpkin hats, especially for children’s items. It’s durable, washable, and comes in an endless array of vibrant colors. For a slightly more luxurious feel, you could also consider a cotton-acrylic blend.
- Color Palette: The obvious choice is a warm, rich orange for your pumpkin body. But don’t be afraid to get creative! Consider a deep burgundy for a sugar pumpkin, a golden yellow for a heirloom variety, or even a muted green for a more unconventional gourd. For the stem, a nice earthy brown or a mossy green works wonderfully.
- Hook Size: Generally, a hook size between H/8 (5.0mm) and I/9 (5.5mm) will be perfect for worsted weight yarn. The exact size might vary slightly depending on your personal tension and the specific yarn you choose. It’s always a good idea to make a small swatch first to check your gauge – you want your stitches to be snug enough to prevent gaps, but not so tight that the fabric is stiff.
### Stitch Techniques: Building Your Pumpkin, Stitch by Stitch
This pattern primarily utilizes a few fundamental crochet stitches, making it accessible for beginners while still offering a satisfying and quick project.
- Magic Ring (or Adjustable Chain Ring): This is how we’ll start the crown of our pumpkin, creating a neat, closed circle without a visible hole. It’s a beginner-friendly technique once you get the hang of it!
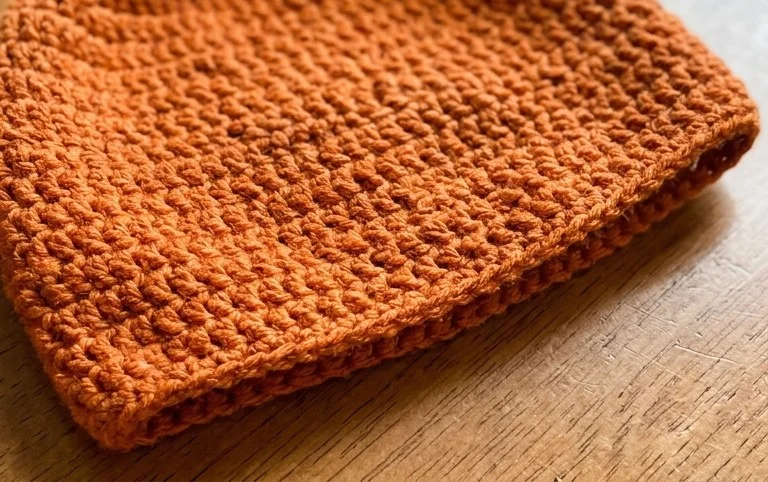
- Single Crochet (sc): The backbone of our hat! Single crochet stitches create a dense fabric that’s perfect for holding its shape and providing warmth.
- Half Double Crochet (hdc): Used sparingly, half double crochet can add a subtle textural variation or help transition between sections.
- Double Crochet (dc): While not the primary stitch for the body, double crochet might be used for any brim or embellishments if you decide to add them.
- Increase (inc): To create the gradual widening of the pumpkin hat, we’ll use increases. This typically involves working two single crochet stitches into the same stitch from the previous row.
- Decrease (dec): When we start to shape the top of the hat, we’ll use decreases, which involve working two stitches together to create a more tapered effect.
### Tips for Our Lovely Beginners: Hooking Your Way to Success
If you’re new to the crochet world, don’t fret! This pumpkin hat is an excellent project to build your confidence.
- Practice the Basics: Before diving into the hat, spend some time practicing the magic ring, single crochet, and increases. There are tons of fantastic video tutorials available online that can visually guide you through these stitches.
- Read Through First: Always read the entire pattern before you begin. This will give you a good overview of the steps involved and help you anticipate any tricky parts.
- Use a Stitch Marker: For circular projects like hats, a stitch marker is your best friend for keeping track of the beginning of each round. Place it in the first stitch of every round.
- Don’t Be Afraid to Undo: We all make mistakes! If you notice an error, it’s better to gently pull out a few stitches (this is called frogging!) than to try and crochet over it.
- Tension is Key: Try to maintain consistent tension throughout your work. This will result in a more even and professional-looking finished product.
- Gauge Swatch is Your Friend: Seriously, don’t skip the gauge swatch! It might seem like an extra step, but it ensures your hat will turn out the correct size.
### Customizing Your Crochet Pumpkin: Making it Uniquely Yours
One of the joys of crochet is the endless possibility for personalization! Here’s how you can make your pumpkin hat truly one-of-a-kind:
Size Matters: A Hat for Every Head
This pattern is designed to be easily adaptable for all sizes, from preemie to adult. The key is following the increase rounds until you reach your desired circumference for the widest part of the hat. For each size, you’ll typically work a specific number of increase rounds. You’ll then continue crocheting in even rounds without increases until the hat reaches the desired height for that size. It’s always a good idea to measure your intended recipient’s head circumference or use a standard sizing chart as a guide.
Color Combinations: Beyond the Classic Orange
As mentioned, the color possibilities are vast!
- Ombre Effect: Transition from a lighter shade of orange to a deeper one within the body of the hat for a beautiful ombre effect.
- Striped Pumpkin: Alternate between different shades of orange, or even introduce complementary colors like brown or green for stripes.
- Accents: Use a contrasting color for the stem, or add a few decorative stitches in a different yarn color around the brim.
Embellishments: Adding That Extra Touch
Once your pumpkin hat is crocheted, you can take it to the next level with embellishments!
- Stem Variations: Instead of a simple crocheted stem, try adding a twisted strand of yarn, a small felt leaf, or even a tiny button for extra detail.
- Appliqués: Crochet small leaves, acorns, or even little ghost shapes to attach to the hat.
- Felt Features: Cut out small felt shapes for eyes and mouths to turn your pumpkin hat into a friendly jack-o’-lantern face!
- Pom-Pom Power: A fluffy pom-pom on top can add a playful and whimsical touch.
### Caring for Your Cozy Creation: Keeping Your Pumpkin Perfect
Your handmade pumpkin hat is a labor of love, and with a little care, it will last for many seasons to come.
- Washing: For acrylic yarns, machine washing on a gentle cycle with cold water is usually safe. Always check your yarn label for specific care instructions.
- Drying: It’s best to lay your hat flat to dry to help it maintain its shape. Avoid putting it in a high-heat dryer, as this can cause acrylic yarn to melt or become misshapen.
- Spot Cleaning: For minor spills, you can often spot clean the affected area with a damp cloth and mild soap.
### Project Ideas: More Than Just a Hat!
While the pumpkin hat is a star on its own, this versatile pattern can inspire other delightful crochet projects:
- Pumpkin Coasters: Simply work fewer rounds to create adorable coasters for your autumn table setting.
- Pumpkin Garland: Make a series of mini pumpkin hats and string them together to create a festive garland.
- Stuffed Pumpkin: Crochet two pumpkin hat pieces and seam them together, stuffing firmly with fiberfill to create a cute decorative pumpkin.
- Pet Hats: Scale down the pattern to create adorable pumpkin hats for your furry friends (ensure the fit is comfortable and safe for your pet).
So there you have it! A comprehensive guide to crocheting the perfect pumpkin hat in all sizes. Whether you’re a seasoned crafter or just starting your crochet journey, this project is sure to bring joy and a touch of autumnal magic into your life. Happy crocheting, and may your crafting adventures be as bright and cheerful as a patch of sunlit pumpkins!
You’ve reached the end of our cozy crochet pumpkin hat pattern! I hope you’re feeling inspired to grab your yarn and hook and create some adorable pumpkin hats for everyone in your life, from the tiniest newborns to the biggest pumpkin lovers. Don’t forget to share your delightful finished creations with us on social media using #CrochetPumpkinJoy – we can’t wait to see your crafty masterpieces!
Feel free to experiment with different yarn colors for a unique twist, or even add embellishments like embroidered faces or tiny crochet leaves. And if you’ve fallen in love with this project, there are always more adventures waiting for you in our pattern library. Happy crocheting!